Internal forces in depth: beam element, area rule, cantilever and point load
The equilibrium of the beam element, the area rule for drawing shear and moment by hand, the cantilever with a tip load and the simply supported beam with a point load proved, the method in five steps.
https://www.electronics-engineering.com/en/internal-forces-in-depth-area-rule/
This page goes deeper into the lesson on internal forces: it draws the equilibrium of the beam element, derives the area rule, the quickest way to draw the diagrams by hand, proves the diagrams of the cantilever and of the beam with a point load at an arbitrary position and sums up the method in five steps.
The beam element and the area rule
The proof of the differential relations is easier to follow by looking at the element with all forces and moments in their positive directions.
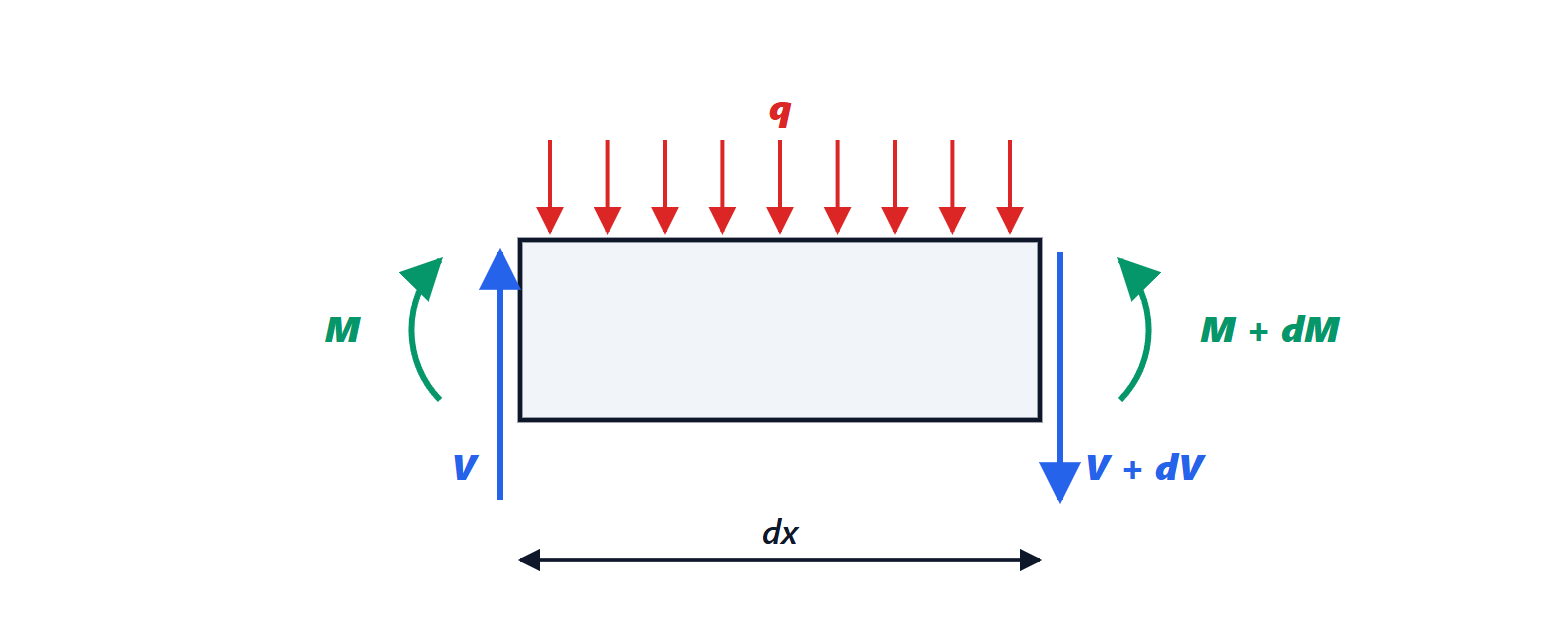
The two relations can also be integrated between two sections  and
 :

This is the area rule, the quickest way to draw the diagrams by hand:
- the change in shear between two sections equals (with the sign changed) the total load applied between them;
- the change in moment between two sections equals the area of the shear diagram between them.
A concentrated load  is the limit of a very narrow distributed load: its integral is over a length of zero, so the shear jumps by
 at the point of application, while the moment, being the integral of a bounded function, stays continuous but changes slope (a kink). In the same way a concentrated couple makes the moment jump.
The cantilever with a load at the tip
Theorem. For a cantilever of span  fixed at the left, with a load at the free end, at a distance
 from the fixed end:

Proof. It is convenient to write the equilibrium of the right-hand part, which does not contain the fixed end and therefore needs no reactions. Cutting at , the right-hand part carries downwards at its end and the internal actions on its left face. Vertical equilibrium gives a shear equal to ; moment equilibrium about the section gives a moment  that stretches the top fibres: with the adopted convention it is negative. At
 it equals
 . ∎
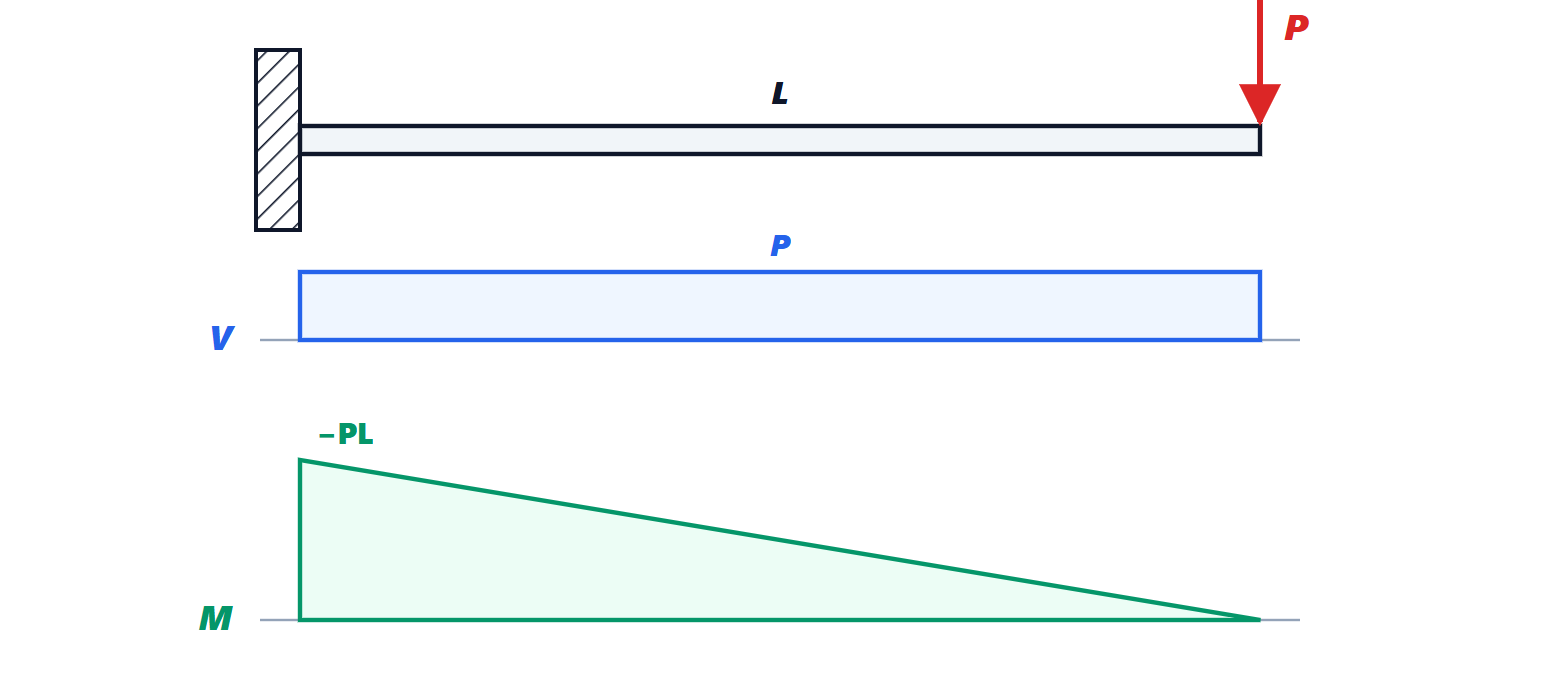
Check with the area rule. The area of the shear diagram from to is ; the moment at the right end is zero, so  . Same result, without writing any equilibrium equation.
The simply supported beam with a point load
Theorem. A simply supported beam of span with a load at a distance  from the left support (and
 from the right one) has reactions
 ,
 , and the maximum moment under the load:
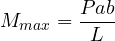
Proof. Moment equilibrium about  gives
 ; vertical equilibrium gives
 . The shear is
 to the left of the load and
 to the right: it changes sign under the load, where the moment is maximum. By the area rule the moment there equals the area of the shear rectangle between
 and the load:
 . ∎
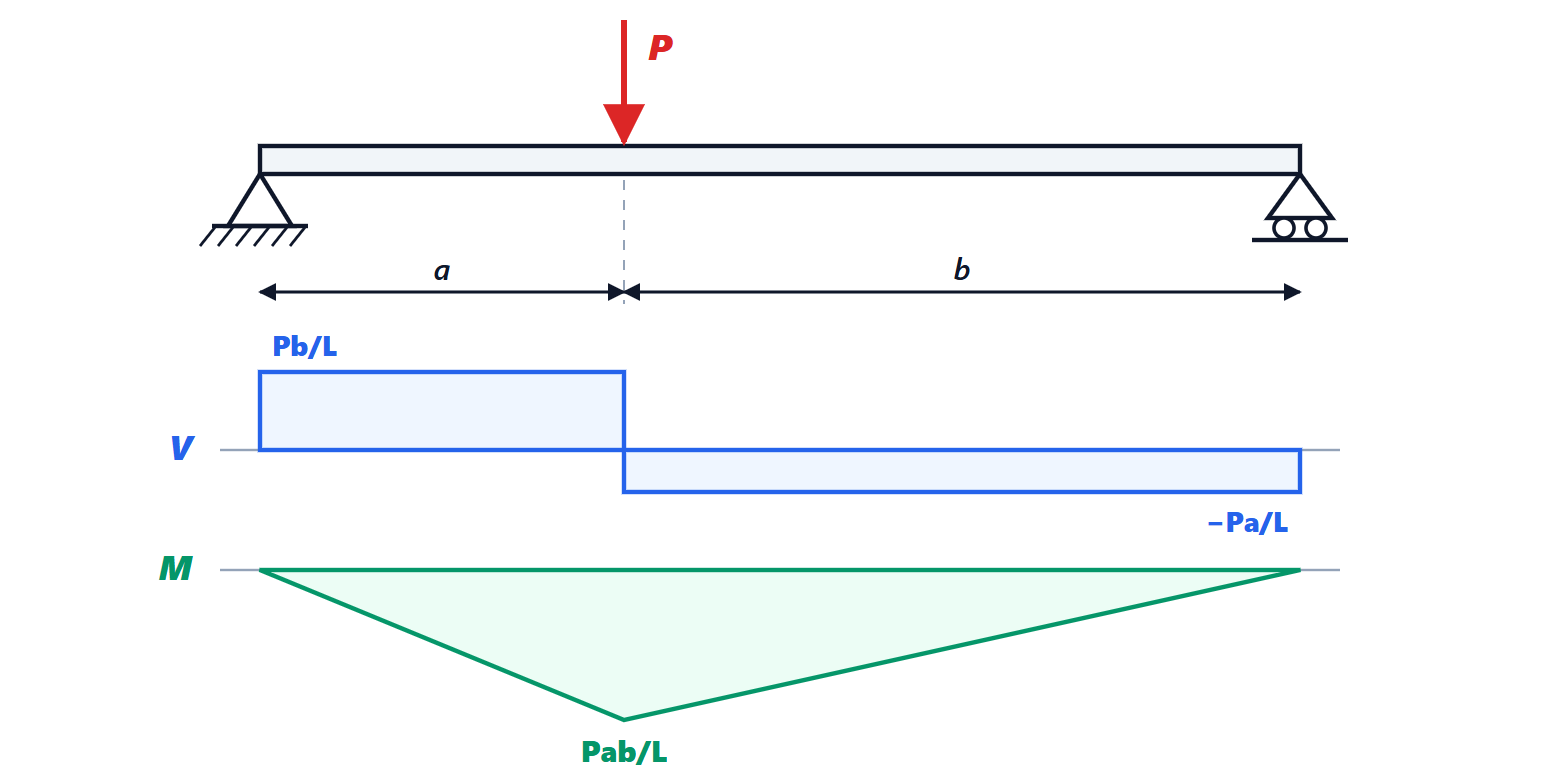
With the load at midspan  and we recover the
 of the table in the lesson. It is also the worst position: the product
 with
 fixed is maximum for
 .
The method, step by step
For any statically determinate beam the procedure is always the same:
- Support reactions from the three equilibrium equations of the whole beam (lesson on statically determinate structures). It pays to write the moment equations about the supports, so that each equation has a single unknown.
- Segments: split the beam at the points where the load changes (concentrated loads, start and end of distributed loads, supports).
- Shear: start from one end and proceed with the area rule, adding the jumps of the concentrated loads and the slopes
 of the distributed loads.
- Moment: integrate the shear, again with the area rule; the maxima are where the shear vanishes or changes sign.
- Checks: the moment must return to zero at free ends and at end supports; at the end the shear must close with the reaction of the last support.
Common mistakes
- Changing convention halfway through: choose a convention for shear and moment (here: moment positive when it stretches the bottom fibres) and keep it, always writing the equilibrium of the same part, right or left.
- Looking for the maximum moment only where
 : with point loads the shear jumps without passing through zero, and the maximum is at the jump where the shear changes sign.
- Ignoring the sign of the reactions: a negative reaction is not a calculation error, but information about the support (see the beam with an overhang).
- Confusing the area of the load with the area of the shear: the area of the load gives the change in shear, the area of the shear the change in moment.
- Units: the moment is measured in kN·m (force times length), the distributed load in kN/m; mixing them up is the most common mistake in exams.
Exercises on the topic, with simply supported beams, cantilevers and overhangs, are on the exercise page linked at the top.